WakeOnLANx provides Wake On LAN (WoL) capabilities, which makes it convenient when you need to remotely power-on (wake) computers on your network. Some folks like to use Wake On LAN in conjunction with their routine maintenance for patching / updating their computers. The reason this can work nicely is because once you have Wake On LAN configured for your computers, you’ll be able to patch them even if they are powered down when your maintenance window begins. With Wake On LAN you’ll be able to remotely power-on the computers, initiate the patching process, and then optionally shut them down again after completing the maintenance. Note, Wake On LAN needs to be enabled in two places before it will work. Below we will explain how to enable it in both the BIOS and in Windows.
Enable Wake On LAN in the BIOS
To access the BIOS on a computer, you’ll need to restart the computer while sitting watching the console. During the setup phase, you should be prompted to enter the BIOS by pressing a hotkey on your keyboard. For many BIOS manufacturers this is F1 or Delete, but it could be any key. Read what is displayed on your console and follow directions to enter the BIOS or SETUP. If you’re unable to proceed, consult the documentation for your computer hardware from the manufacturer.
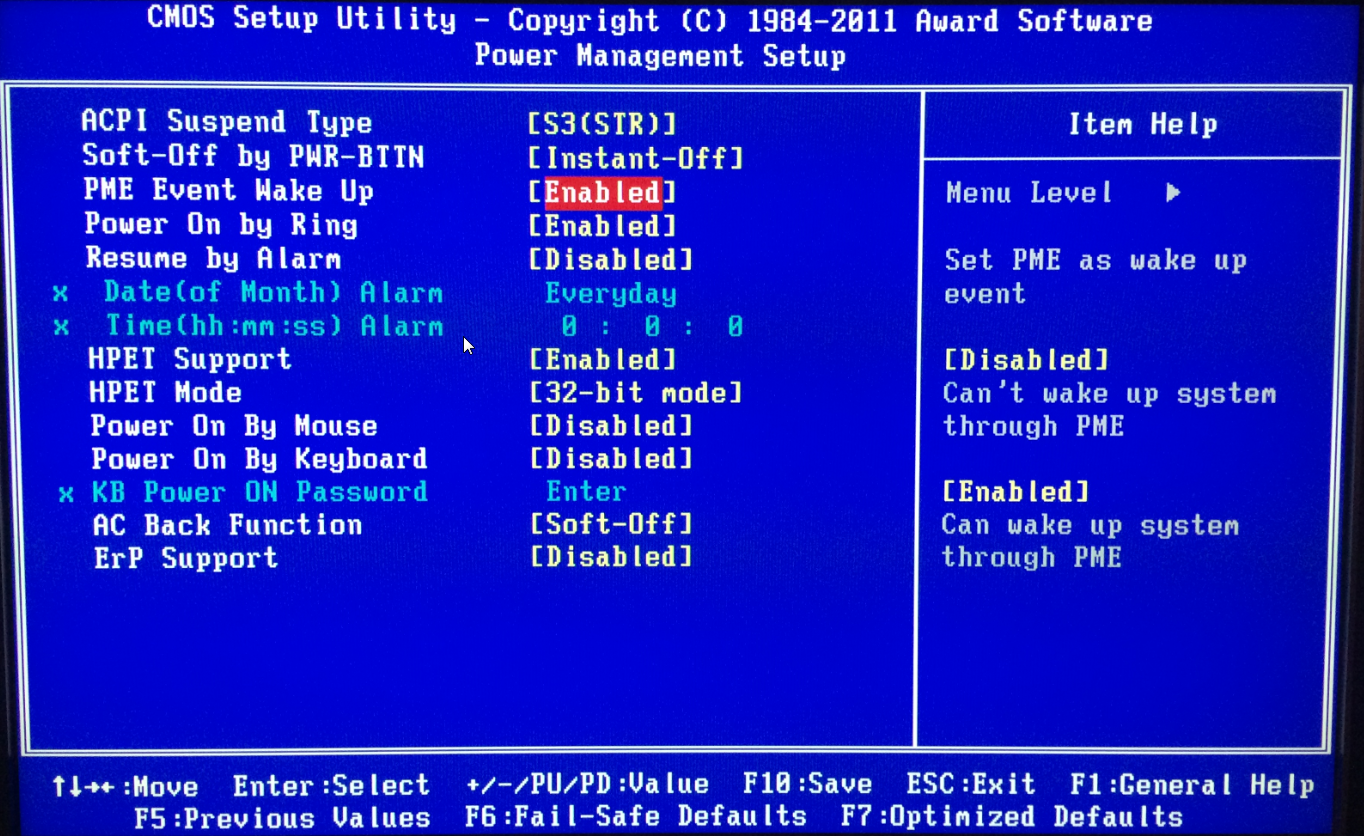
Once you’ve entered the BIOS / SETUP for your computer, go to the power management section. You need to find the entry for WOL, Wake-up, PME (Power Management Events) or similar. Enable the setting. The AMC BIOS page for Wake On LAN is shown below under “PME Event Wake Up.”
Enable Wake On LAN in Windows
Now that you’ve enabled Wake-on-LAN in the BIOS, you must also enable it in Windows. Launch the ‘Network Connections’ screen by opening the ‘Control Panel > Network and Sharing Center > Change adapter settings’ screen. You can also get to this screen by clicking ‘Start > Run,’ and then type “control netconnections” without the quotes.
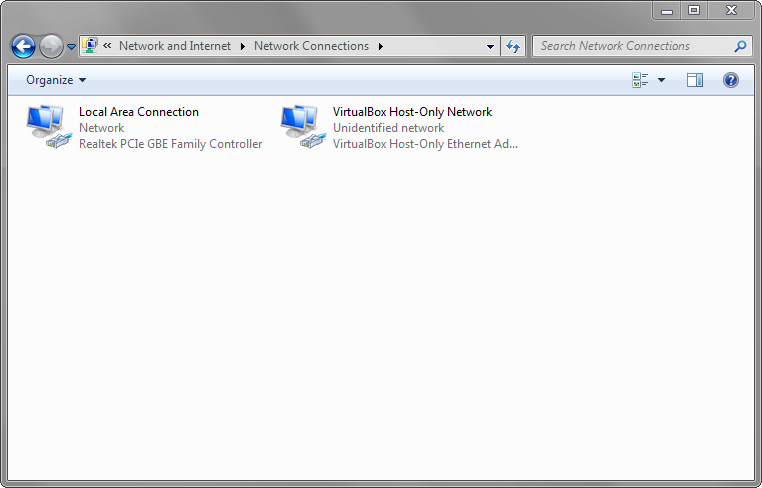
From here, right-click on your ‘Local Area Connection’ and select “Properties.”
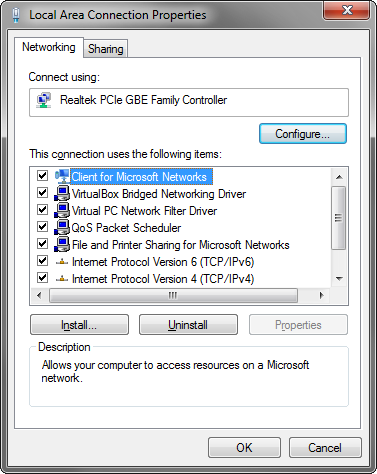
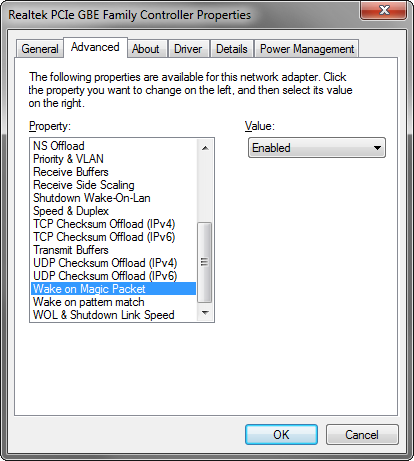
In the Local Area Connection Properties window click the “Configure” button. You’ll be presented with all of the configuration options for your network adapter. In the “Advanced” tab, find the option for Wake-on-LAN. This might be presented as “Magic Packet” or similar. Use your judgement to determine the correct setting since different network adapter drivers will present it slightly differently. In the screenshot below you can see that my computer lists it as “Wake on Magic Packet.”
Adding MAC addresses to the WakeOnLANx Grid
Now that you’ve configured your computer to wake when it receives the “magic packet,” you’re ready to use WakeOnLANx to initiate the wake-on-LAN process. The MAC address of the target computer is required for Wake-on-LAN, and you have a couple different ways to get it into the WakeOnLANx grid.
Option A:
Load the target host name into the grid and then retrieve the MAC address by using the “Get Information > Get MAC Address” option. Note, that under certain conditions if a machine has many MAC addresses with multiple active network adapters, it’s possible that WakeOnLANx will retrieve a MAC address for an adapter that is not on the network that you expect. In this case you might have to revert to Option B.
Option B:
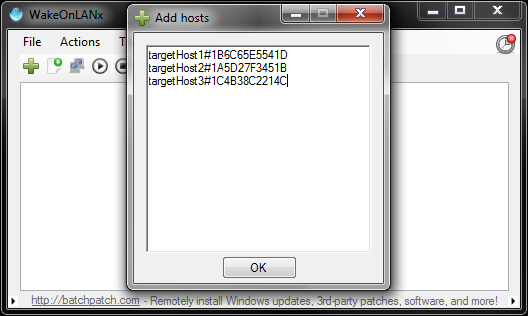
Load the target host name WITH its MAC address by using the following syntax in the “Add Hosts” dialog:
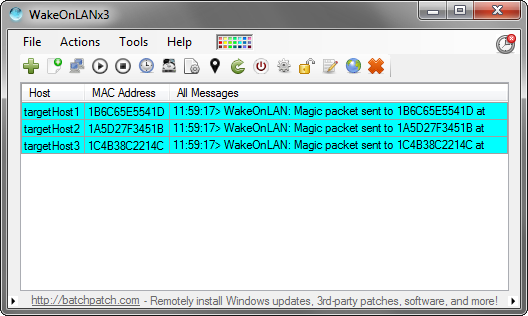
targetHost1#1B6C65E5541D
targetHost2#1A5D27F3451B
targetHost3#1C4B38C2214C
Sending the Magic Packet
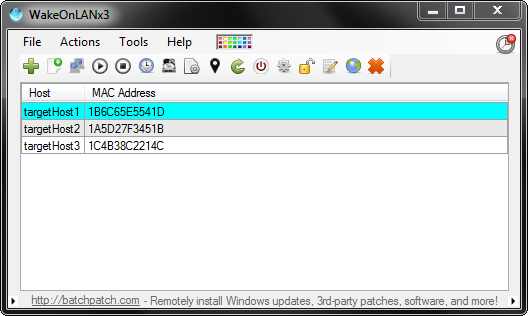
Now that you have your hosts and MACs loaded into the WakeOnLANx grid, you’re ready to send the magic packet to wake the target machines. Highlight the hosts and go to Actions > Wake on LAN.